You may have guessed this by now, but we here at HipTravelMama LOVE beautiful photography. So we thought it was time to share some expert tips to help us moms (and dads) capture the perfect photo of those precious moments with our families while traveling. 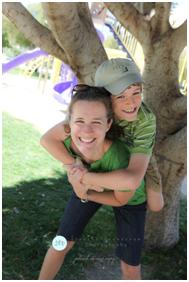 This is a guest post from friend, neighbor and Seattle-area based photographer (who captured the first days of our precious newborn), Judith Fernstrom. She is a talented and amazing mom of three awesome children. Her blog and website can be found at Judith Fernstrom Photography and you can also find her on Facebook. Enjoy!
We all know that travel provides amazing photo opportunities. But the combination of travel, plus a mama with a camera, is a force to be reckoned with! The family vacation is the perfect chance to get those shots that melt your heart and bring back sweet memories, as well as to document family history. With that in mind, here are a few photography tips to help maximize the experience.
THE TECHNICAL STUFF
Lighting
The first, and most important, tip for taking a better picture is the one that is the most challenging: turn off your flash. It creates harsh, unflattering light, and I’m sure none of us want unflattering anything. This will make it difficult to take any great indoor photos unless you happen to be handy with your DSLR and are willing to work with your camera settings, but that is on the advanced side of things. Some alternatives:
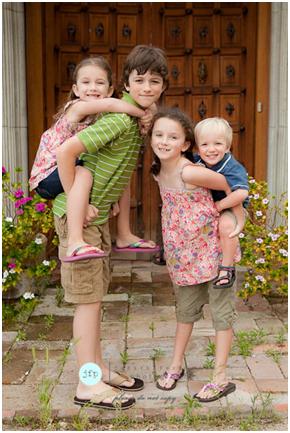
Find nice, open shade. This photo above is a good example of open shade – still enough light for a good (though somewhat goofy) photo but not the blazing, full sun you can see behind us.
Shoot in the morning or just before sunset. Noontime sun can be very difficult and tends to make dark shadows where the eyes should be, with the added bonus of creating lots of squinty-eyed, complaining children. However, shooting during the golden hour or just before sunset (which I love the best) may not be the most opportune time to shoot the smaller set, who might do better in the morning. Finding the balance between the happy child in great natural light, and the grumpy, hungry, tired child, is the one that gets me every time… especially if you want a group photo with more than one kid in it.
This one was taken about an hour or so before I would have liked, but nobody was tired and cranky yet which allowed me to get all four in one shot, just for their grandmother.
Focus
Digital cameras have opened up photography to be easily accessible to the masses. One of the handiest features is that it is now possible to take a photo by looking at the LCD screen on the back of your camera, instead of looking through the eye hole. This has been wonderful for getting shots of very small people who are much more likely to smile or laugh at you than at your camera.
The down side of this is that holding your camera away from your face and body has the tendency to create camera shake, which results in fuzzy, out of focus photos. A simple tip for sharper photos is to go back to the old-fashioned method of holding your digital camera up to your eye. Steadying the camera against your face can help avoid the blurry pictures that sometimes result from a shaky hand. If you are handy with your DSLR, you can always increase your shutter speed to compensate for a little hand shake.
Manual
If you happen to be a camera toting mama fortunate enough to have a DSLR, but aren’t quite sure what to do it, I’ve got a few ideas for you. First, I’m going to recommend Me Ra Koh’s set of DVDs. These were tailor made just for mamas with cameras – no fancy technical terms, and lots of helpful examples for taking better photos of your very own kiddos, and besides that, they are just plain goofy fun.
Alternatively, grab a snack and a drink and park yourself somewhere quiet with that handy manual that came with your camera. I know that’s not for everybody (especially me) but there is a ton of useful information in there just waiting to get out. There are also lots of great books (this Nick Kelsh book is one of my favorites), classes and online forums (Clickin’ Moms is a great one) dedicated to learning how to take better pictures of your kiddos. That being said, I think the best thing you can do to improve your photos is to experiment and practice. Grab your camera and head out to the park with your kids and just try shooting at a lower aperture or a higher shutter speed.
THE ARTSY PART (AKA TELLING YOUR STORY)
For me, the most important part of taking vacation photos is to tell the story of our trip. I want to be sure to capture all the interesting parts of the story. Go back to your third grade writing assignments and think in the terms of who, what, where, when and sometimes how and why. Can I tell who went on the trip? Can I tell where we were? What did we do all day? When (on the grand scale of life) did this happen? For me this is determined by the size/age of the kids.
The More, the Merrier
 Taking a ton of photos will drastically increase your chances of getting that great photo. While you are shooting try several different angles – shoot from above, from below, from the right and then the left, zoom in, zoom out, try a little camera tilt, focus on the small details and then on the big picture. This is the digital age, there’s nothing holding you back. Beware, at first this might bug your children beyond reason, but after a while they will start ignoring you and your camera and you will hit photographic gold. This is when you’ll get to see the real them and those true expressions… smiles, laughter, joy, and even sometimes a great pouty face.
Perspectives:
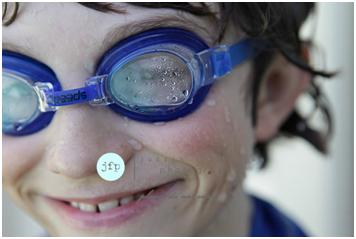
Take some super close up, all the way zoomed in for great details and something a little different and artsy.
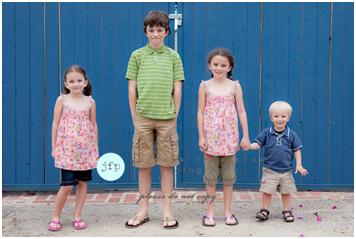
But also be sure to pull back so you get some perspective on the size of your subjects. I like this photo because it documents the ages, stages, and sizes of the kids, and it will always remind us of the beautiful house with the blue gate that we stayed at on this particular trip.
You can even take photos without people looking at you (gasp!) to help capture feeling. Besides, it’s easier than begging them to look at you “one more time”, and you should have some shots of them just doing their own thing. These shots are often the ones that capture the true spirit of the trip better than any posed shots possibly could.
Location, location, location
You’ll want to be able to tell where you actually went on your fabulous trip just by looking at the photos.
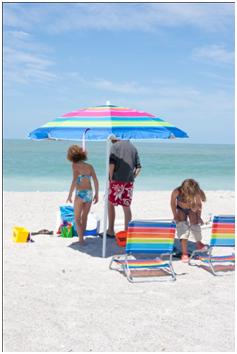
Sometimes it’s enough to show that you were somewhere sunny and warm.
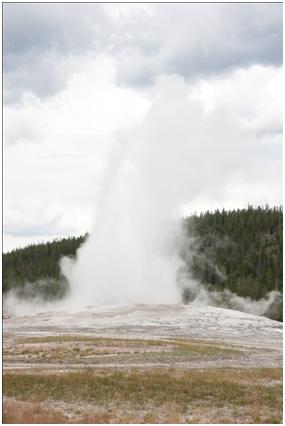 But sometimes, you’ll want to show more about the great places you’ve been, especially if there are distinctive landmarks, like say the Eiffel Tower or Disneyland. So be sure to snap some shots of those identifying details. This is Old Faithful, Yellowstone National Park… but then you already knew that.
Don’t forget you can include people in these shots also. They can really help tell your story and make some of the details more memorable. Sulfur Hot Springs, Yellowstone National Park… lots of storytelling going on here!
Proof Positive
Be sure to relinquish control of the camera long enough for someone else to snap a photo with you in it. I have many strong feelings on this subject, which you can read about here, but to sum it up quickly, it’s nice if there is proof that you were actually there, on vacation, with your children.
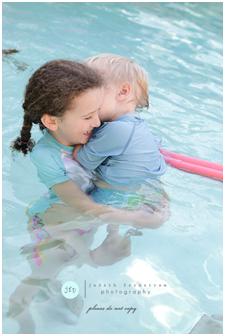
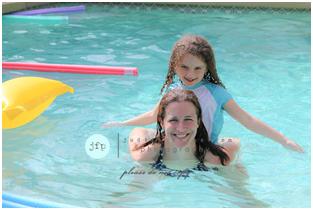
(Secret tip: Photos taken while in the pool, even with dripping wet hair, are way more figure flattering than any shot taken while sitting on that comfortable chaise lounge in your bathing suit.)
POST VACATION DOWNLOAD
So you’ve been on a fabulous family vacation, and you’ve taken hundreds upon hundreds of fabulous photos, and probably twice as many not-so-fabulous ones. The next piece is key: you must actually get the pictures off the camera and onto the computer! It can be helpful to set a deadline of uploading your pictures within 48 hours of arriving home. The longer you wait, the less likely you are to follow through with any of the following brilliant ideas.
Editing
Once they are uploaded to the computer, go through and star, or somehow designate, any that make you smile or squeal with joy. Next, delete anything that is completely out of focus and, if there are multiples of the same shot pick the best and dump the rest. Then group the ones that are starred into one folder, which will usually bring your total photo count number down to a more manageable number.
Now you should look through these favorites and see if they tell the story of your trip. Who, what, where, when and sometimes how and why? Can you tell who went on the trip? Can you tell where you were? What you did all day? When (on the grand scale of life) did this happen? If you can answer all these questions with the photos in your favorites folder, you probably don’t need the rest. If you absolutely can’t possibly delete the rest, that’s fine, just move them to an external hard drive so they don’t slow down your computer.
Displaying Your Handiwork
A challenging task for most, you now need to actually do something with all these wonderful photos. Here are just a few ideas to get you started…
Make a mini vacation album. Blurb, Shutterfly and My Publisher all make this a super easy task. I actually find it a lot of fun designing these books, and your kiddos will love looking through them too.
Create an alphabet book using your trip pics. This can be a fun challenge for the kids. You can even make it part of your vacation activities, adjusting the difficulty level to match the ages of your kids. (Tip: eat Quesadillas at least once on your trip!)
Print your favorites! MPix is a great online resource for printing your photos. It is the retail side of a lab used by lots of professional photogs. The beauty of online storage and ordering is that you can easily share your fabulous photos with Grandma and Grandpa, or your travel buddies, so that they can enjoy them too. If you are someone who needs a little instant gratification (like I am), Costco also does a good, inexpensive job at printing, and is available the same day, usually within the hour.
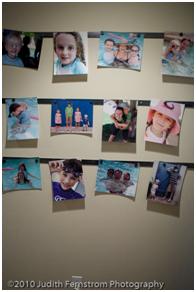
Display your prints somewhere so you can see them often. I particularly enjoy seeing my sunny vacation photos on those gray, drizzly days of winter. I even have a special wall dedicated to vacation photos because I want to be able to change them out regularly with new trip shots. This is my quick and easy solution:
A couple of metal bars (IKEA has these) and some magnets. Not terribly fancy but I love that it lets me switch them out easily and frequently, and that I get to see them every day. Of course, you don’t have to do this on the same gigantic scale that I have. You can print some 5x7s and a couple of 8x10s and put them in frames around the house – still lovely reminders of a wonderful family trip. And remember, photos don’t have to be relegated to the family room or the bedroom – I have covered my laundry room in sunny vacation shots that make doing laundry like a day at the beach (sort of).
Last Word
The most important thing is not that you find the perfect wall or the perfect frame and the perfect photo to put in it, or that you spend hours laying out a photo book that would do a graphic designer proud, but that you make sure to find some way to have your treasured photos see the light of day – even if they are just taped to the fridge! You went to the trouble of taking them, you should make sure to find a way to enjoy them!
